


This project can be as simple as wrapping a piece of twine around a glass/jar twice and then tying it into a bow at the front like these:


However, if you have to go out and buy twine or string for your project, then it kind of defies the purpose of this blog which emphasises making use of recycled materials to create home accessories.
Personally, I don't tend to keep a lot of twine around the place but what I do have a lot of is brown paper bags so if you prefer the more eco-friendly approach/wickerwork look check this out!

What you will need:
- Brown paper bag/twine
- Drinking glass or jar
- Nightlight/candle
- Scissors
- Elastic band/hair bobbin/thread
- Tear a strip off the Paper bag of about an inch in width.

2. Twist the paper strip tightly by twisting the flat side with one hand and holding the twisted part tightly in the other hand to keep it in place.


3. Continue to twist until you reach the end. Press any paper which may be sticking out back into the twist, making sure it is smooth and thin like this when finished:
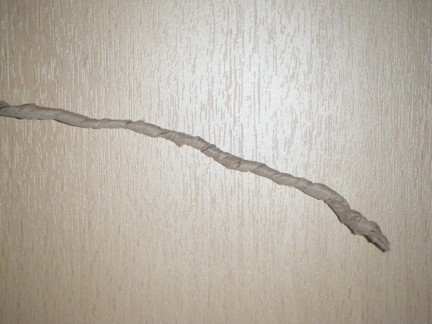
 4. Wrap the twisted paper around a glass and tie at the front, being careful not to tear the paper.

5. You can leave it as is and place a nightlight or a candle in it or you can use it to hold bits and bobs that you might have lying around.


6. If you want, you can create a bow to add on to the front of the glass using another twist of paper.


7. Tie the bow together with string/thread/elastic (or a hair bobbin if you want to be really eco-friendly! You can match this with the rooms colour scheme if you want.) Cut the surplus paper off.

8. Slide in the long piece that will go around the glass in the back of whatever you are using to keep the bow together.

9. Tie the two ends at the back of the glass...

....and tuck in the loose ends.

8. All done!
Get Creative!
You don't have to add string to the glass, here are some other ideas that you could use instead:
- You could add an old elasticated bracelet...


- www.craftychica.com shows you how to make a sleeve out of material for a festive feel...

- You could clip on a flower hair accessory or even thread in a real flower head...

- You could add some stones or sand to the glass/jar to raise up your nightlight or just to add more interest to the design...

- You could also add a band of material around the jar/candle before you add the string/ribbon as seen on www.robomargo.com:

- Or wrap the string around a shell like this:

If you have any other ideas I'd love to hear them! :) Happy creating!


